Pinhole cameras are a great way to get down to the fundamentals of photography. In my personal camera history I recall going from the occasional Polaroid or disposable camera to a point & shoot situation. That was just for fun. It wasn’t until I entered the blogosphere that higher quality photos for everyday life became necessary and I lucked into my first dSLR camera. Since then I’ve upgraded to a better Nikon, a D3200, which is by no means the best camera around, but is certainly more than awesome enough for my needs. Still, in all that experience I never really had a chance to appreciate the physical dark room. I had the opportunity to take a class at UW where we learned our way around the dark room. We only had a few days, but it was quite the experience, so I thought I’d share.
You can recreate the conditions of a darkroom by using a Safelight. If you don’t have one of those you can use a flashlight covered in several layers of red cellophane. I don’t know about that method, though. If you’re doing this at home, I definitely suggest using photo paper instead of film. If you were to print onto film, you’d be able to make prints but photo paper is easier.
Need: box or can, awl or needle, lightfast tape (duct works), photo paper, development bath, stop bath, water, three tubs (large enough for your photos to lay flat) and patience.
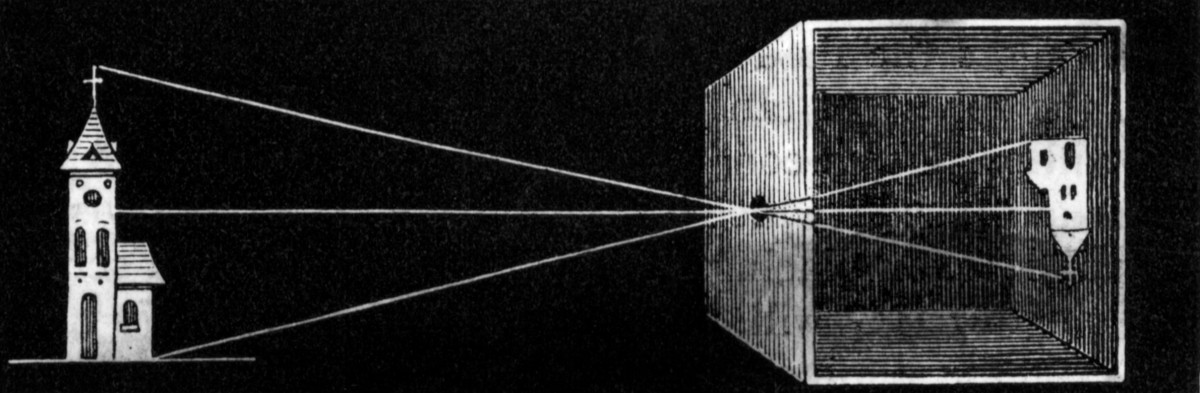
Camera Body
You can use a box or a can, but bear in mind the can would yield a curved photo. Almost like a fish-eye lens. I went straight up square box and still ended up with some rounded images. Whether you use a box or a can, paint the inside black.
Poking Pinholes
Use a thin sheet of metal for your lens, mine is steel but other students had pretty good results with thick aluminum. Good hole-pokers would be awls, needles, icepicks or the pointy end of a drawing compass. The direction in which you poke will need to face inside the box, otherwise your photos may be distorted. That’s the thing about pinhole cameras, it’s fairly simple but there are a lot of variables that can cause mayhem and distortion. But try it both ways, that may be the look you’re going for.

Shutter
Cut a hole in your box or can. The hole should be smaller than the sheet of metal your pinhole is poked in. Tape all around the perimeter and then cut another piece of tape, fold over the edge and place over the hole from the outside of the box. The folded edge helps ease opening and closing your shutter quickly–which is how you take pictures–without shaking the box.

Lock & Load
Load up your pinhole camera with photo paper. I just used more duct tape to adhere it to the bottom of the box, but it got a little too sticky for the paper. I’d suggest something more easily removable. Put the treated side face up. Tape all the edges so it’s lightfast.

Shoot
Take your camera somewhere cool, lift the shutter tape and wait. Time your exposures and experiment. This process requires patience, friends, as you’ll have to feel out the best exposure time for the lighting you’re working with.
Develop
Create a three-tub assembly line for your development fluid, stop bath and water. Follow the instructions and your heart in the development process. While the instructions for my development fluid said something around 3 minutes, I found that what I wanted varied widely depending on the shot in question. After your image is developed to your liking, move on to the stop bath which neutralizes the development fluid. 30 seconds there and then into the water. The darkroom at UW has student-technicians who rinse and dry your prints for you. At first I thought this would be awesome, but when I picked them up from a huge bucket of wrinkled prints all thrown together haphazardly, I had another opinion. Several of my classmates’ photos were ruined in the process. All stuck together. Fuff!
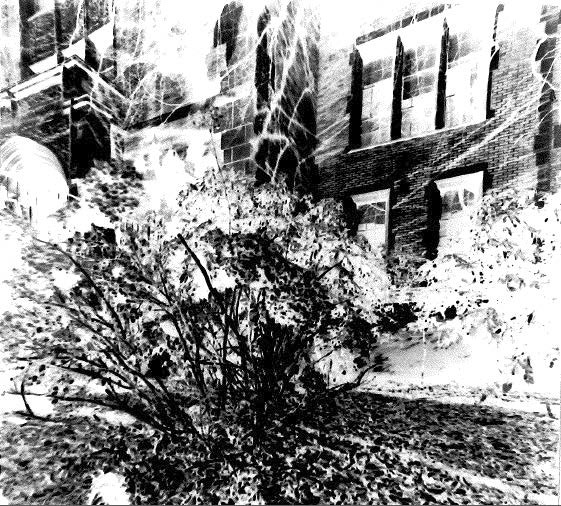
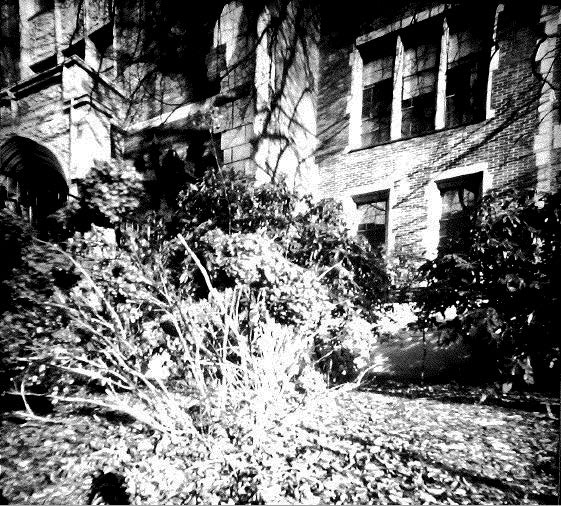
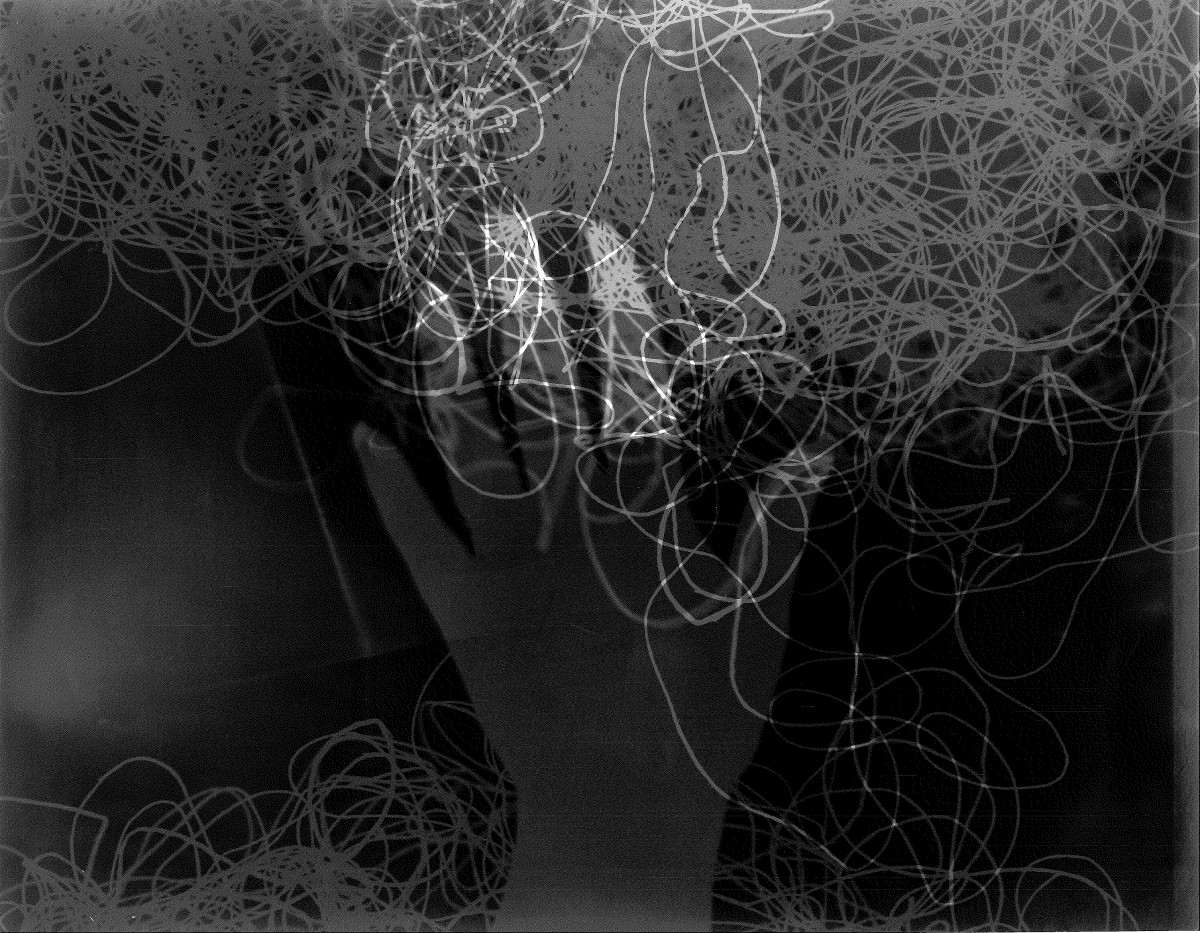
Of the photos I took using the pinhole process, these are my favorites. Pinholes actually print the inverted colorfield, so I scanned these and inverted in Photoshop. I like them both!


Thanks for taking some time to craft with me today. Always a pleasure!
xo,
Sunshine


_1")