BUY ART

Wednesday, Mar. 2, & Thursday, Mar. 3; 11am-6pm both days

“The campus community and public are invited to a sale of work by current students and alumni.

This year, BUY ART is working with Strange Coupling to create two very different events, offered at the same time, and sharing the same goal – support of UW Art majors and alums.”

Strange Coupling is, “a student-run tradition in the Division of Art for over a decade, Strange Coupling bridges the gap between the UW and the greater Seattle art community by pairing students with professional artists for a collaborative project. This exhibit shows the work of student applicants, which is auctioned to support this year’s projects. The selected students and their artist mate will be announced at the Friday evening event.

The 2016 jurors are Jen Graves, Melanie King (MA 2008), Catharina Manchanda, Amanda Manitach, and Jeffry Mitchell.

The professional artists are Iole Alessandrini, Michael Alm, Byron Au Yong, Zack Bent (MFA 2008), Coldbrew Collective, Alice Gosti, Lauren Iida, Stephanie Liapis, Francesca Lohmann, Emily Ann Pothast (MFA 2005), and Norie Sato (MFA 1974).”

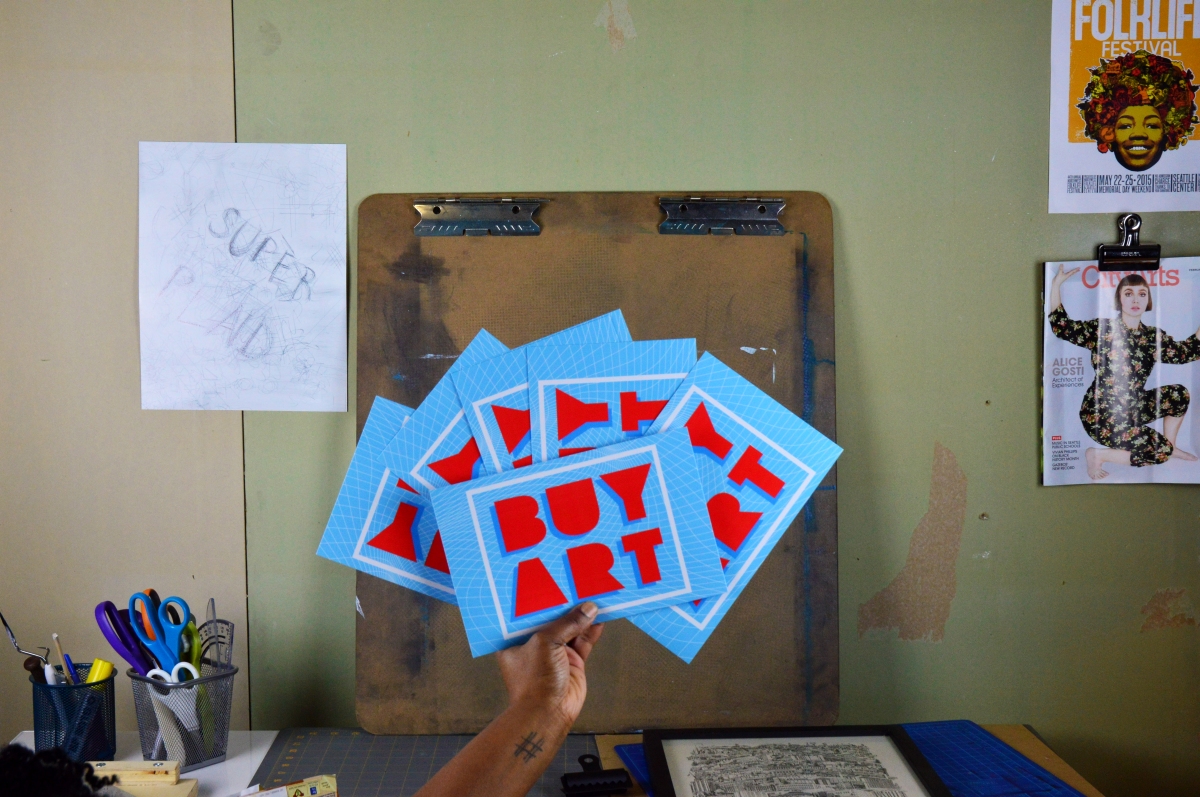
I had entirely too much going on to participate in both events, but you can find my artwork for sale in the BUY ART event. There’ll be monotype and relief prints. You can quickly distinguish my work by the sales number, #25.


Also, on display will be the works of some crazy talented classmates such as E.R. Saba. Her sales number is #41. Keep an eye out!

Fall-Erika-Saba

Fall by E.R. Saba | Oil on Canvas | 20″ x 24″ | 2015 | Image appears courtesy of Artist

This is a great chance to step into collecting, you’ll be getting in on the ground floor of Seattle’s up-and-coming arts community.

See you there, boo!

Brianna Wray Signature


Need more info: BUY ART & Strange Coupling Event Page.

Make: Relief Prints

I recently graduated from Shoreline, but that doesn’t mean I could resist one more school project. It all started when my amazing printmaking professor, Natalie, brought up the idea of steamroller printmaking casually in class. Then again in an art club meeting. None of us knew what was involved so with a bit of prodding we found out that steamroller printmaking is exactly as cool as it sounds. Let me explain:

A relief print is made using tools to carve away the blank spaces in an image, leaving the portion that is to be black raised. Then you use a brayer to evenly coat the surface in ink and use pressure to transfer the image onto paper. Voila! Except, you can imagine, the steamroller version is much bigger. The width of the steamroller is about 4 feet, so our smaller boards are 4 ft x 3 ft and the larger ones are 4 ft x 8 ft.

Step 1: Design

Once the ball was rolling on our big idea, members of the art club went about applying for (and winning!) grant money from school. When we told the steamroller company why we wanted their services, they decided to offer them for free! With all that money we were able to get boards and carving tools for everyone. Being that we’re laying the whole thing out on the ground, I wasn’t sure which way would be up or if my design would necessarily flow into others’ work. This became the basis for my drawing. I wanted something I could flip either way and find pleasing. I also wanted my image to be segmented. Our theme was diversity in campus life. It’s vague and yet specific. Diversity makes me think less about how we’re different and more about how we’re the same. Down to the cellular level. Cell formation became the inspiration for the lace corner. Owls and trees are just a general recurring theme in my work. Oh, and I love that when you look at it owl side up, the other one looks almost like a bat hanging from a branch.

Step 2: Prepping & Projecting

wpid-img_20140526_184330_4382.jpg.jpeg

The MDF board was extra soft. To prep it for all the carving, I coated it with one good layer of acrylic primer. Once my drawing was finalized I copied it onto a transparency sheet and used my projector to draw the image on my board with a Sharpie. As you can see, Pokie helped.

Step 3: Carving

Now that the easy part is done, it’s time to carve. I spent about 6 hours working on it so far and there’s still a ways to go. But you know I’m happy when my hands are covered in sawdust.

wpid-img_20140527_155124_0712.jpg.jpeg

I’ll be back to show you what it looks like all finished and showcase our art fair (June 28th-29th)! What projects are working on these days? Making anything outlandish, awesome or outlandishly awesome? I want to know! Put in the comments below.

Ex Oh,

Sunshine Wray